Hi! My name is Thar Pyi Kway. Welcome to read my second blog post. Now I am going to write about Water Management. During the mornings we learned in the classroom and in the afternoons we leaned by doing work. I would like to share with all of the people in the world. I hope it will be helpful to you all. This lesson was helpful to me and my community.
In class we learned about how to do the swales, ditch, check dam, A-frame, water level, terrace and sheet mulching.
A swale is a shallow trench on the contour of the land. If the rain comes they will hold more water for the crops. You also need to plant trees or other plants beside the swale. If you don’t plant the plants, erosion will happen and the water will be dirty. For the the swale we can make many steps. If you have sloped ground you can make 3 or 4 steps.
If we make the ditch it is good for managing water too, because it moves the water. The ditch is used to move the water to another place. If you don’t want the water to go into the ground you can make it with concrete. I saw some of the people they used the ditch to take water from the river. I think I will go back to do this thing.
We also learned about how to do check dams. They are useful to slow down the water. For the check dams we can make many ways. We can make with bamboo, wood, concrete or rocks. We can use natural things to make check damns, so we do not need to pay a lot to do it and it is easy to fix.
We also learned about how to make the A-frame and water level, and also how to use them! For the A-frame the materials that we need is: three pieces of bamboo or wood, 3 or 4 nails to nail on the wood or bamboo, a rock that is not too small and a small string to tie the rock to make the weight. You can make the three pieces of wood or bamboo like “A” shape and nail the corner with nails and tie the string to the top corner. First you need to tie the rock and find the center and you will mark with pen. Now I will explain how to use so you will find the level ground. You put the A-frame somewhere and see if the string hits the mark or not. If it does not hit the center, the ground is not level. You need to move the other side of the A-frame until you find level ground. Once you find the level spot, you can put the stake to mark the spots. For me the lesson is my favorite.
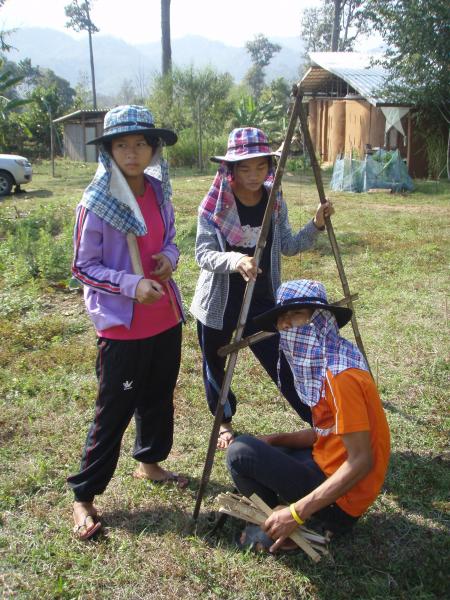
In this photo we tried to find level ground. My friend said, “A-frame is so easy to make and find the level ground.”
For the water level the materials that we need is: two sticks, hose and some water. We also can use the water level to find the level ground. For this we mark how many centimeter [ + ] and [ – ] on both sticks, and we tie the hose to both sticks. If we see both sides are the same or only a little bit different it’s level.
Terrace Gardens at Grace Garden
We learned these topics, but we also worked as much as we could. I’m not good at digging the dirt. We learned about how to make terraces. We have to dig the ground to be flat, level and nice, even though the ground is not flat originally. We need to make sure the edge is a little bit higher than the other side. If we make like that it will hold the rainwater and the water will go into the ground. The water will become clean and the plants will get clean water. Then the plant will grow very good.
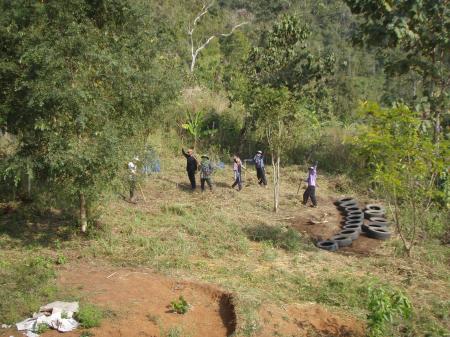
In this picture, we start to dig the terrace. This lesson is so hard for me because I’m not good at digging.
After you dig the terrace you need to grow the plants that have strong and long roots. For Grace Garden we staked with bamboo and we planted the vetiver grass in the tires. That grass can grow very good. The roots go into the ground a meter deep and they can hold the water. They also control the erosion. When the rain comes the terraces harvest the rainwater to increase infiltration of the water for the plants. The terraces is useful for flood prevention, land drainage, agriculture water distribution, and preventing soil erosion.
We also learned about how to make sheet mulch. First we need to put cardboard all over the place that we will do sheet mulching and we put the grass that we cut down and we spray the water all over the sheet mulching to make wet. This is because you need water for decomposition. Also we use the grass we cut to make new compost. It is sustainable.

We make sheet mulch. It was fun for me and my friend!!!!!!!
I think it will be helpful to my community to save the water and I will go back to teach them how to do it. Thank you for reading my second blog post and May God Bless You All!!!
This post was written by Thar Pyi Kyaw.